Wednesday, October 29, 2014

Cinnamon Rolls


I would like to call these "Fool Proof Cinnamon Rolls" but I'm not going to. Whenever I see a recipe for cinnamon rolls labeled as "Fool Proof" - I try them - I screw them up. 
Cinnamon rolls, before this day, have been my kryptonite!!
Either the bread wouldn't rise properly, or I wouldn't roll the dough out enough so there was too much bread and not enough filling, or the filling would drain out completely leaving me with this delicious caramel glaze in the bottom of the pan - delicious, but not what I wanted.
I had given up all hope of ever making a decent cinnamon roll, regardless of how "fool proof" the recipe was!!
Not for lack of talent though - Creme Brulee?! YES! Mousse of the chocolate and pumpkin variety (my latest accomplishment) Absolutely!! Dinner rolls?! Anytime!!
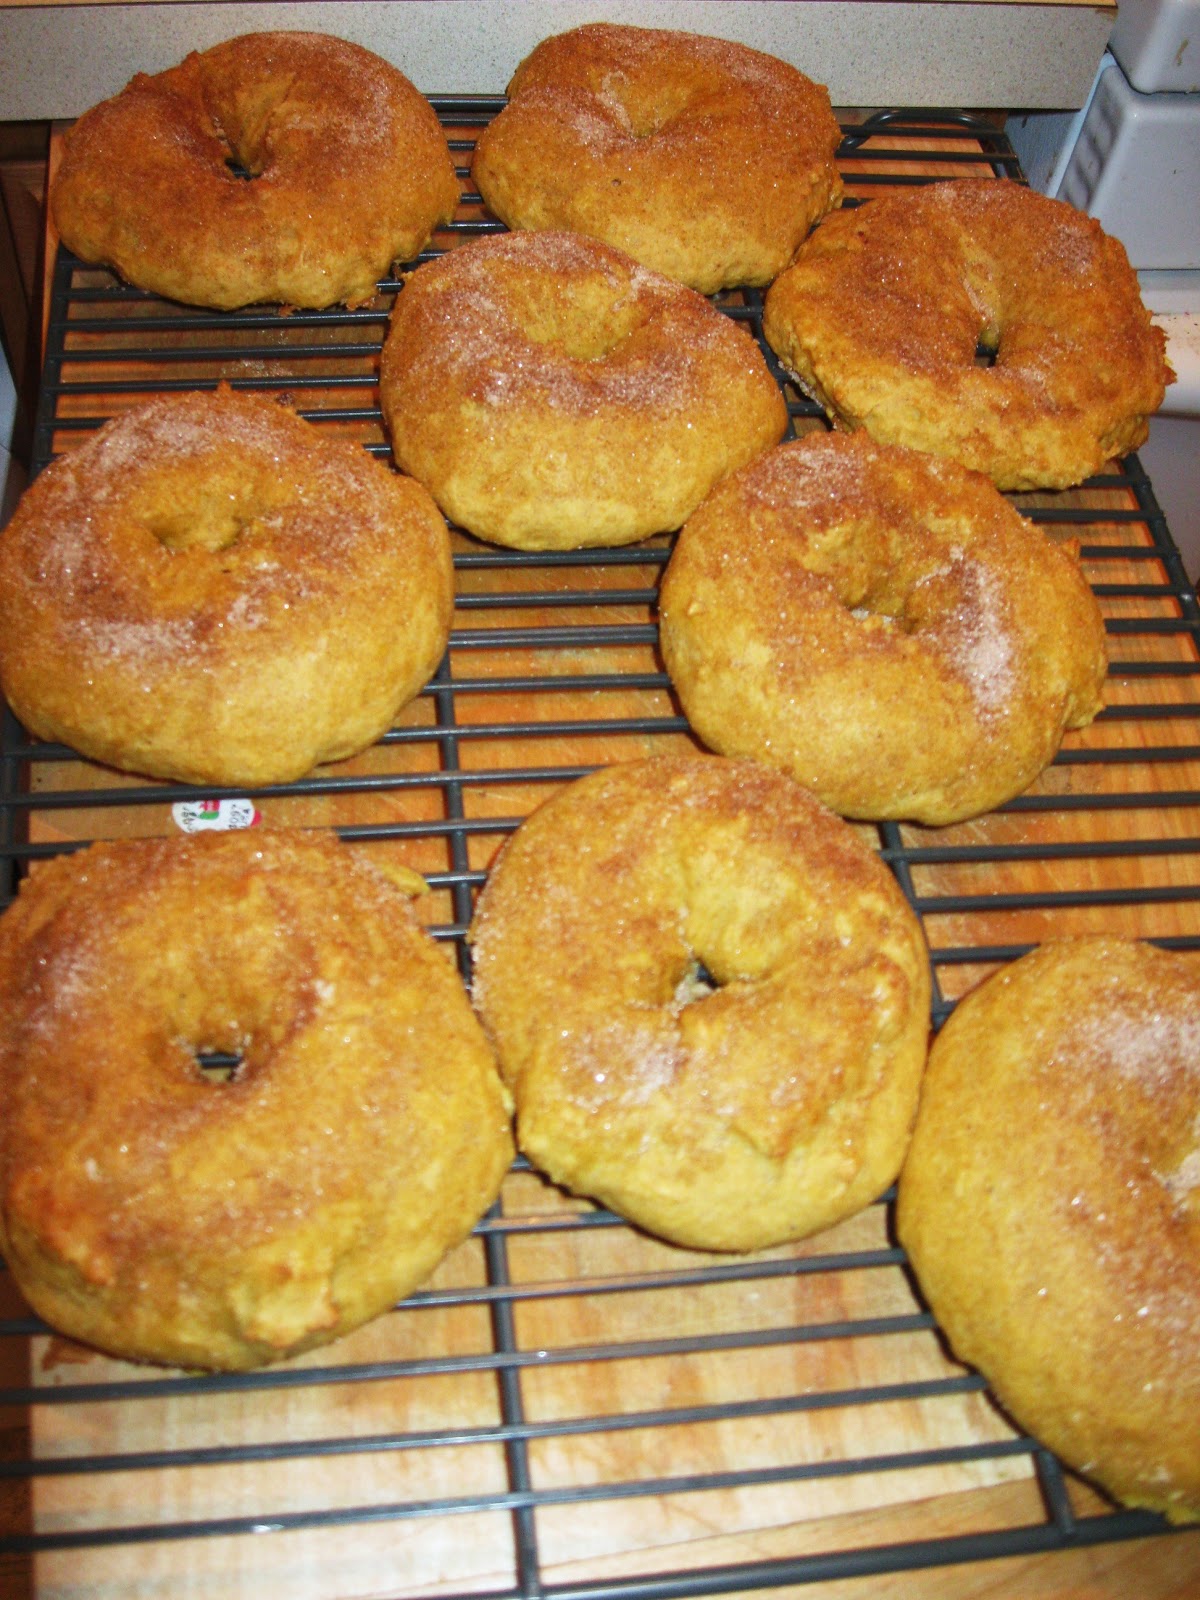
I am pretty decent in the kitchen when it comes to baking skills but for some reason, the cinnamon roll has always been "the one that got away". Until now!! Today! On this very day, October 29th, 2014, I have accomplished the impossible - I have made some pretty darn tasty cinnamon rolls!!!!!
Here is the recipe - which is compilation of 2 different recipes:

Rolls (which come from here):
3/4 C Milk
4 Tbl Butter cut into cubes
3/4 C Hot water
1/4 C Sugar
1 tsp Salt
4-5 C flour
1 heap Tbl Yeast

Microwave milk and butter 1 min, stir, microwave an additional 30 seconds. Pour into mixing bowl with Hot water, sugar, salt and 2 C of flour. Mix with dough hook for 1 min. With the mixer on low, add in yeast, and then slowly add in the remaining 2-3 C flour until the dough no longer sticks to the bowl. Mix 5 minutes. After 5 mins turn mixer off, remove bowl and let the dough set for 5 mins. Preheat the oven to 170  - - -

This is where you can decide to either finish out the dinner roll instructions which are: Grease pan, sharp knife and counter, turn dough out and cut into 12 or 24 equal portions, Roll into shape and place in pan. OR you can decide to take the cinnamon roll route which goes as follows.

Filling (which I got here)
1/2 C Butter
3/4 C Sugar (I used brown)
2 Tbl Cinnamon
3/4 C raisins, nuts, chocolate chips, boogers...whatever it is that you put in your cinnamon rolls - my family is full of weirdos, and they don't like "stuff" in their rolls, so I left this particular step out..

I mostly melted the butter, which means I took 2 of my adorable 1/4 c sticks of butter out of the fridge, unwrapped them, put them in a bowl (do I really need to add those steps in?!) and microwaved it until it started popping (oops! added chore to my list) and then I took it out and mushed *yes mushed* the unmelted butter into the melted butter, making it....mostly melted.
Anywho. Add the sugar and cinnamon to your mostly melted butter and stick it in the fridge (you heard me!! Stick your mostly melted butter, sugar and cinnamon BACK into the fridge) Now, turn out your dough on to your greased and floured counter and roll that sucker out until it's uhmmmmm I don't know. Cinnamon roll thickness?! what is that!? 1/4-1/2 inch?!
So roll it out until it's 1/3 inch in thickness and then spread that sugary goodness all over it!!!! so that it looks like this:
YUM right?!
Ok. Next your going to roll it up. Start from the long side, and take a deep breath, because this is where the patience is required. Remember you want the cinnamon roll to be good to you later, so don't be mean to it now!! Roll that delicious little bundle up until it' looks like a log. Now go get some floss. YES FLOSS!!! Take some floss, mine is minty in case you were wondering (and no it didn't alter the taste), and slide it under the middle of your log, bring your floss together and pull tight....if you're doing it right, it should have cut your cinnamon roll log perfectly, and by perfectly, what I really mean is - you have 2 logs instead of one.... Good!
Now, cut those halves in half, and those halves in half and so on and so forth until you have....6x4 issss....24. Approximately 24 cinnamon rolls. Put them in your buttered AND Sugared baking dish....Yes. I want you to smear butter all over the inside of your dish and then sprinkle sugar (white sugar) all over the butter!!!

Put those in the oven that is sitting at 170* for 20 mins. When the timer goes off, DON'T TAKE THEM OUT OF THE OVEN!!! Reset the oven for 350* and the timer for 15-20 mins.  When THAT timer goes off, your house should smell amazing, your family will shower you with roses and hugs and kisses and your husband will consider calling in sick so that he can stay home and take care of the kids so that you can run away for a few hours!!!!!!! Well that was fun. Now, back to reality.

Take them out of the oven and let them set on the back of the stove for a few mins while you make up whatever kind of icing or frosting you like to put on your cinnamon rolls.  - We favor the cream cheese variety.

There you have it. Cinnamon rolls!!! Now. take one, and go hide in the closet with your music so you can't hear the kids trashing the house!






Thursday, October 25, 2012

Eggnog Cookies

I have learned something while making these cookies. Eggnog has no middle ground; you either LOVE it, or you HATE it!! To each there own. I happen to be one of those "weirdo's" that LOVE LOVE LOVE Eggnog! I found this recipe for Eggnog Cookies, and I was all like =O WHAT?!?!?!
I knew they HAD to be made!!!! So with a little neighborly support (Thanks J for the eggnog) I made my house smell like warm, comforting eggnog! MMMMMmmmmmmm
*Makes 3 dozen cookies*
2 1/4 C Flour
1 tsp Baking Powder
1/2 tsp Cinnamon
1/2 tsp nutmeg
1 1/4 C Sugar
3/4 C Butter, softened
1/2 C Eggnog
1 tsp Vanilla 
2 egg yolks
1 Tbl nutmeg for sprinkling

Preheat oven to 300*
whisk together flour, baking powder, cinnamon and nutmeg.
In a large bowl cream butter and sugar, add eggnog vanilla and egg yolks. When it's smooth (Takes about 5 mins) mix in dry ingrediants until combined.
scoop onto cookie sheet 1 inch apart and bake at 300* for 20-25 mins.
Let cool on cookie sheet for a few mins and then transfer to a wire rack.

Eggnog Glaze
3 C Powdered Sugar
1/4 C Soft Butter
1/2 C Eggnog

Beat butter and sugar, and then pour in eggnog while mixing until desired consistency is reached.  Spread/drizzle/drip onto your cookies and then sprinkle with nutmeg!
*don't go crazy with the nutmeg sprinkle, it doesn't take much*
 These are super delish!! And if you like the taste but not texture of eggnog, make these!!!! You get the flavor with out the thick texture of eggnog!!
Needless to say, this one's a keeper!!!

Saturday, October 20, 2012

Pumpkin Doughnuts

Fall is upon us and 'tis the season for PUMPKIN!!!! I was having a strong desire (I shy away from the word craving because of the implications it brings when a woman uses it) for Pumpkin doughnuts, so I said to myself, "SELF?! Why don't we just make some?!"  So Myself found a recipe here and, with a little advice from my friends, I made some!!!
Here is my recipe:
 
3 1/2 c Flour
4 tsp Baking Powder
1 tsp Salt
2 tsp Pumpkin pie spice
1 c Sugar
2 tbl Butter softend
2 Eggs
2 tsp Vanilla
1/2 c. Buttermilk
1 c Pumpkin Puree (about 1/2 of the small can of pumpkin)
Canola oil for frying (I baked mine)

In a large bowl whisk together the flour, baking powder, salt, spice, and sugar. Make a well in the center.
In a separate bowl combine Butter, eggs, vanilla, buttermilk and pumpkin.
Dump wet ingredients into the well and stir until mixture is well combined.
Turn out onto a lightly floured surface, rolling the donut dough to approximately 1/4-1/2" thick.
Cut out with doughnut cutter.

*If you are baking them simply spoon batter into a doughnut pan (which looks like this, and yes; I do need one). If you don't have one of these nifty little contraptions, you can do what I did and put the dough/batter into a gallon sized zip lock bag and pipe them onto a large cookie sheet. I was able to fit 6 onto 1 jelly roll pan. That is how I ended up with my giant, very rustic, doughnuts!!

Heat 2 inches of oil in a large skillet over medium-high heat. When oil is hot, gently slide donuts into the oil, frying on the first side until edges of the donut are lightly browned, flip carefully and allow to cook on the other side until lightly browned.
Remove and dunk immediately into buttermilk glaze. allow to air dry on a cooling rack before serving.

Buttermilk glaze
3 c Powdered sugar
1/2 c. Buttermilk
1/2 tsp Vanilla
Whisk together in a small bowl until smooth.

*I topped mine with cinnamon sugar...because I love cinnamon sugar as much as I love pumpkin!
 

So there you have it!  Homemade, pumpkin muffins, disguised as doughnuts!


Oatmeal Banana Cake

This is AMAZING!!! It is my new favorite way to use up banana's that are getting a little too ripe. It is delicious, It's pretty, it's healthy and it's something I don't mind letting my kids eat all they want of!! AWESOME!!!
I started with THIS recipe from A Pinch of Joy
and altered it a bit to make it my own.

Here is what I ended up with.
  • 1.5 cups flour 
  • 1 C. Oats
  • 1 teaspoon baking soda
  • ¼ teaspoon salt
  • 1 teaspoon Pumpkin Pie Spice
  • ½ cup applesauce, sugar free or no sugar added
  • ¾ cup honey
  • 2 eggs
  • 3 ripe / overripe bananas, mashed
  1. Preheat oven and lightly grease a 9x13 cake pan
  2. Mix together applesauce and honey.
  3. Mash bananas. Overripe bananas work well for this purpose.
  4. Add bananas and eggs to applesauce and honey mixture and mix until well blended.
  5. Add flour, baking soda, pumpkin pie spice and salt at the same time – do NOT stir ingredients in one at a time. Mix just until dry ingredients are moistened.
  6. Divide batter evenly between the two prepared pans.
  7. Bake at 350 degrees for 30-40 minutes, until a toothpick inserted into the center of the loaf comes out clean.
  8. Let cake cool 5-10 minutes in the pan and then cut into squares and enjoy!!
Gary helped me make this and it turned out so delicious!!! Love it!!!


Monday, July 9, 2012

Frozen Banana Pie

This pie is amazing!! Perfect for summer when your last 2 bananas have gotten to that awkward, ripened stage where they are just fine, but also just brown enough that no one wants to eat them.
There is no butter in this pie, requires ZERO baking, and has very few ingredients. It does, however, require some planning and thinking ahead. Not very good for last minute.
Makes 2 pies

You'll need:
1 Can Evaporated milk, chilled in the freezer for at least 2-3 hrs.
2 eggs
1 C. Sugar
2 Bananas, mashed
Juice of 2 lemons, (1 medium lemon yields about 3 tbls juice)
2 pkgs Graham crackers
Whip chilled milk until it will stand in peaks.
Beat egg, add sugar, beat until light and lemon colored, and mashed bananas, add salt and lemon juice. Stir into whipped milk. Crush 1 pkg graham crackers at a time and push dry crumbs into pie dish (NO Butter is added to graham crackers).
Gently pour banana milk mixture into pie crumbs and freeze.  I gave my pies 24 hrs to freeze.
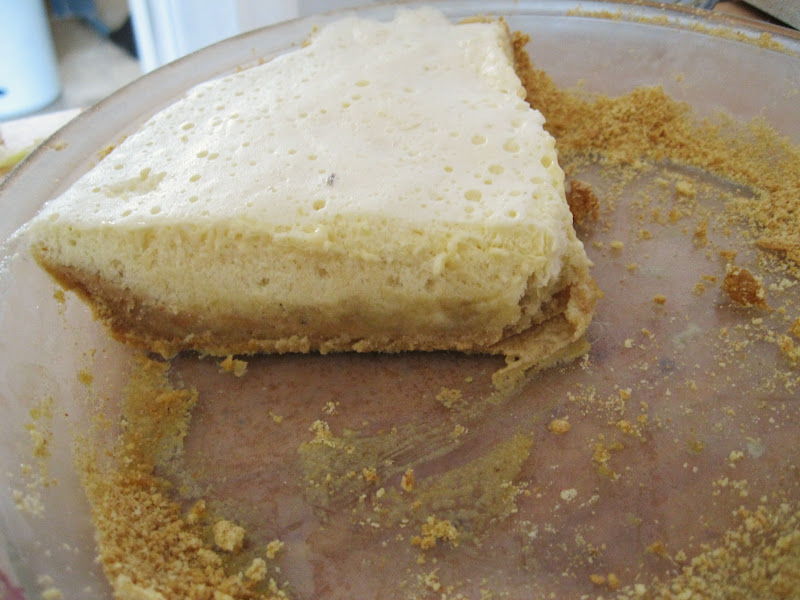
This pie seriously tastes like a frozen banana smoothie! It is SO good! The mashed bananas sink to the bottom and soak the crumbs which is what helps the crumbs stick together! It's like magic!!!!
It does not require any thawing time in order to cut. I took mine out and cut it right away. It does melt quite quickly so it's not a frozen pie that can be left out for any length of time.

This was definitely a hit at our house and will definitely be made again soon!!!!


Tuesday, April 10, 2012

Tacosanga

So aparently this is also calld layered enchiladas but tacosanga is a lot more fun to say!
It's super easy and pretty quick!
1lb hamburger
Taco seasoning
1 can vegitarian refried beans
1 can corn, drained
1 C salsa
Cheese
Brown Hamburger, add seasoning, beans, corn and salsa

Layer like a lasagna.
A bit of sauce, a taco shell

Sauce, cheese

Taco shell, sauce, cheese,
Top layer is just shell and cheese

Bake at 350 for 20-30 mins the cheese


Tuesday, November 1, 2011

FALLin for Roast Chicken

My Oh My!! This is AMAZING and SO Super easy!!
1 large sweet potato
3-4 small apples
4 carrots
2-3 stalks of celery
1/2 large onion
Chicken - I used frozen thighs and drumsticks because my kids love the "handle chicken"
Olive Oil, Salt & Pepper

Cut veggies and apples in to chunks and dump into roasting dish. Place chicken on top and coat everything with olive oil salt & pepper.
If you want more flavor you could add poultry seasoning, or herbs. My family tends to prefer the "raw" taste.
Roast in 350 oven for 1 hr or until chicken juices run clear.
After it came out I took the apple skins off and mushed the apples into the juices in the bottom of the pan and it made the best "sauce"

Make this TONIGHT!!! Your family will be warm, happy and ready for November!

Monday, August 22, 2011

Fully loaded Chicken Salad

I made this for a block party and everyone really liked it.
Now as I have mentioned before, I don't measure (except when I bake) I just throw stuff together till it tastes good. So all of these "measurements" are a guess as to how much I used =)
What was in it:
1 pkg Salad noodles, 3 carrots, 1 rib celery, 1 small can olives, 1 small apple, 1 can Mandarin oranges, 1 C. Grapes cut in half. 1/2 Can Pineapple tidbits, 1 Can chicken

Dressing (again...none of this was measured):
1-2 C mayo, 1/4 C Mandarin orange juice, 1 tsp Orange extract (Or substitute Mandarin orange juice and extract for 2-3 tbl frozen orange juice concentrate) 3 Tbl Pineapple juice, 2 tsp ginger, Salt and pepper.
Pour over salad ingredients in big bowl and stir.

Wednesday, March 23, 2011

Ravisanga

I was really wanting some lasagna yesterday, but didn't have ricotta cheese in my fridge, so I thought, "Hey! I have cheese ravioli....why can't that work?!"  So I tried it, and it does!! It was even something Bubba could help with, which I always Love (and so does he). Here's it goes:
To make a 9x13 pan
1 1/2 pkg cheese Ravioli
1 1/2 jar Spaghetti sauce
3 links turkey sausage (remove case and cook to a crumble)
Shredded cheese to top

Boil ravioli until they just start to pop to the surface. You don't want to boil them for the full 7-10 mins as directed on pkg otherwise you will end up with mushy raviolis and that makes it hard to layer, and wont make for a very good ravisagna

Layer sauce

Ravioli
the reason some are different colors is because my 1/2 pkg was mushroom ravioli.

Crumbled turkey sausage, more sauce,

One more layer of ravioli and sauce, top with cheese
Bake at 350 for 30 mins.

Let it set for 15 mins before cutting

The nice part about this is, it's easy, fast, very kid friendly, and pretty inexpensive. You can cut it like a regular lasagna or scoop it out, depending on how you put the ravioli down they will be on top of each other for optimal scoopage!  It taste just like Lasagna! Enjoy

Tuesday, March 8, 2011

Vegetable Soup

I've started a diet (insert *Gasp* here).  It's a soup based diet, and so far it's pretty decent.

Here's the recipe for the soup. It's a pretty good soup and the whole pot is only 1150 calories, and it makes a HUGE pot!!!

1 Bunch of Celery (I like the Celery Hearts)
2 lbs Carrots
3 Large Green Onions (I used 1/2 yellow onion)
2 Green Peppers
-Chop veggies and put into a LARGE Soup Pot and cover with water. Boil for 10 mins.
-Dump in remaining ingredients
1 Large can (1 32oz Box) Beef broth (Low sodium/fat)
2 Cans Cut Green Beans Drained
1 can Stewed Tomatoes (I used Italian Style) I squish them in my hand before dumping them in.
1 pkg Lipton Soup Mix (Chicken Noodle)
-Bring back to boil and simmer until veggies are tender.
May season with Salt and Pepper, curry, parsley, bouillon, hot sauce or Worcestershire sauce.

Because you eat this soup all day long for 7 days I like to season it differently every day to keep it from getting old.  Yesterday I put the hot sauce in it, and today I'm adding Curry. So far so good!

The rest of the diet
Day 1- soup and Fruit (except bananas)
Day 2- Soup and Veggies (except corn, peas and beans)  I'm putting extra veggies (mushrooms, red peepers, zucchini, yellow squash) in the soup to make it extra chunky.
        Have a baked potato with butter for dinner.    (Do NOT eat any fruit today)
Day 3- Soup, fruit and veggies. No baked potato  Today I plan to eat the leftover super veggie filled soup and make fruit smoothies using frozen fruit, milk, and 100% Cranberry juice (I got mine from the natural foods section to make sure it was unsweetened)
Day 4- Soup, Bananas, Skim Milk.  Eat at least 3 bananas and drink as much milk as you can.  I plan on freezing the milk and making banana smoothies (just bananas and milk)  Because I really, highly dislike eating bananas and drinking milk. But I can drink a banana smoothie
Day 5- Beef and tomatoes: you may have 10-20 oz of beef and up to 6 tomatoes. Eat the soup at least once today.  I bought steak and Cherry tomatoes for this. I can pop cherry tomatoes all day where it's hard for me to sit down and eat a whole tomato
Day 6- Beef and Veggies. Eat all the beef and veggies you want today. You can even have 2-3 steaks if you like with green leafy veggies, but NO baked potato. Be sure to eat the soup at least once today. I plan on making the super chunky vegetable version in the crock pot and throwing steak in the soup.....I am very excited about this day!
Day 7- Brown rice, unsweetened juice and veggies until full. (don't forget about your soup)  I plan on putting the rice in the leftover super chunky veggie soup.  also putting veggies in with the rice.

Drink allowed
Unsweetened juices
Tea
Coffee
Cranberry juice
Skim Milk (for those who don't know, because I'm embarrassed to admit that I didn't, that's 1% milk)
Lots of water (I've been drinking water non stop. My hubby brought me home a cup that is hard plastic with a straw and I carry it everywhere and fill it up constantly)

Tuesday, January 18, 2011

Magic Toffee

My brother called and gave me this recipe. Super easy, Super yummy, and I bet you have everything you need right now! 
 This is so easy that I included step by step pics, because you're not gonna believe me!
Seriously!

1 Pkg Saltine Crackers
1 C. Butter
1 C. Brown Sugar
1 Pkg Chocolate Chips

Line cookie sheet with foil
Layer crackers
(I sprayed mine, but you don't need to)

Melt Butter and Brown sugar in pan.
When it starts boiling, stop stirring and boil 3-4 mins.
Seriously. Don't stir it! Resist the urge

Immediately pour Carmel over crackers
Put in 400 Degree oven for 8 Mins

When it comes out put choco chips on top, wait a min, spread chocolate

Cool. This takes 30-45 mins.

Break up and enjoy

Thanks bro for this awesomly easy recipe! It's a total Keeper!


Wednesday, January 12, 2011

Veggie Noodles

I made this for lunch today and we LOVED it!! It's fresh. It's healthy. It's full of veggies. It's good! I asked the Hubs if there was anything he would want changed and he said "This is a no talking meal"  - Which I took as a No. =)
The  best part. You could make this Veggie style super easy!

1 Small Zucchini
1/2 Small Yellow Squash
8oz sliced Baby Bella mushrooms
2-3 carrots sliced on a diagonal
4 Chicken Tenders
1 C Chicken Stock
1/2 C Cream of Chicken Soup
3 Tbl Butter
2-3 Tbl Flour
1/2 pkg Spaghetti noodles

Heat oven to 350, Cook frozen chicken tenders 20 mins. Chop.
Get water boiling for noodles
Heat lg Skillet coating the bottom with 2 Tbl Olive oil. Saute Carrots for 5 mins, Add Butter and mushrooms, cook till Mushrooms are brown and tender. Add Zucchini and squash until tender. add sprinkle flour on veggies, stir, add chicken stock and simmer till thick. Add Soup and chicken. Simmer 5 mins (or until your noodles are cooked to your liking). Add noodles. I like to use the starchy cooking liquid from the noodles to thin out sauce if needed.

Serve, Enjoy!!
I guarantee this will become a family fav.
To make it more vegetarian friendly, just leave out the chicken. Use Veggie stock, and Cream of Mushroom soup, instead of chicken.

Monday, January 10, 2011

Chocolate cookie Cheesecake!

 This is the best Cheesecake I have ever made! granted it's the first cheesecake I've ever made....
I stayed up all night New Years Eve making this one and it was Totally worth it!! My hubby and I Rocked out while we waited for it to bake. We watched the fireworks at the Space Needle at Midnight. And all though I made this for a New Years Day celebration we were going to it was worth the tired eyes! This one is For SURE a keeper! Super rich, super addicting, Super Yummy!!!
Best made 1-2 days in advance!!! Serves 14-20 depending on slice size.

Adapted from this recipe

1 C. Chocolate cookie Crumbs (1-1 1/2 rows with center removed)
1 C. Chocolate Graham Cracker Crumbs
4 Tbl melted Butter
1/4 C Brown Sugar
Combine in a medium bowl and press evenly on to bottom and up 1 in up the side of a 10'' spring form pan. Bake 350 for 5 mins. Set aside

2 lb (4, 8oz squares)  Cream Cheese softened
1 1/4 C White Sugar
1/3 C Heaven whipping Cream
2 Tbl Flour
1 ts Vanilla
4 Eggs
In a large bowl beat Cream Cheese until smooth (5 mins) Gradually mix in sugar, cream, flour, and vanilla. Mix until smooth. Beat eggs in 1 at a time, beating until smooth after each addition.
Pour 1/3 of the batter into pan. top with Chocolate, cream filled, cookies.
Pour remaining batter on top of cookies.
Bake at 350 for 65-70 mins. I baked mine in a water bath*. If you choose to NOT use the water bath. Only bake for 45 mins.
Combine 16 oz Sour Cream, 1/4 C white sugar, 1 tsp Vanilla.
When Cheese cake is done baking, pull out of oven and carefully top with sour cream mixture. Return cake to oven and bake for 15 mins (7 mins w/o water bath). Turn oven off and leave in oven for 30 mins. Remove cheesecake.
Combine 1 C whipping Cream and 1 1/2 C chocolate chips in saucepan. Stir over low heat until Chocolate melts then stir in 1 tsp vanilla. Pour mixture over cheese cake while still warm. Let cool completely on wire rack, Move to Refrigerator and chill at least 8 hrs! remove 30 mins before serving.
The best way to cut this is to have a glass of HOT water and a napkin or towel. Dip sharp knife in hot water, wipe dry, cut. Do this before EACH cut and you will have perfect slices of cheesecake every time!


What are you waiting for?! Make this, NOW! and prepare yourself for some serious compliments!!

*Water Bath. This is how I do mine. I use a roasting pan with rack. I wrap the outside of my spring form pan in foil (because I'm paranoid about water getting in) and I set my cheesecake in the pan on the rack. Fill it with hot Hot HOT water till it's just about an inch up the side of the pan.

Thursday, January 6, 2011

Pizza 101

Pizza Dough
2 Tbl Yeast
1/2 C Warm Water
2 tsp sugar
put in bottom of mixer and let dissolve and foam
while that's working heat, melt and dissolve
1 1/2 C Milk
1/2 C Shortening (I use Olive Oil)
4 Tbl Sugar
Microwave for 2 mins, stirring after 1 to make sure your sugar is dissolving. Add to your yeast slowly while mixing, then add 4 C Flour and 1-2 tsp dried pizza seasoning. Mix well. Dump onto floured surface and knead. roll into ball and let rest.

Toppings:
Whatever you would like. We used (because it's what we had on hand):
Olives
Tomatoes
Ham
Mushrooms
Cheese

Sauce:
Your fav. Spaghetti sauce.
 Here's how you do it:

Spread dough out to desired size
Spread sauce
*sample sauce if desired*

Spread Cheese

Dump on toppings

Bake for 20 mins

Enjoy!!


My boys had so much fun making their own pizza! It is work but Totally worth all the clean up!

Monday, November 22, 2010

Snowy cocoa

What do you do when your house looks like this?!

Make some of this!
I cheated with this one. My neighbor gave me a big tin of Starbucks Hot Cocoa mix. If you know me at all, you know that I'm a sucker for Starbucks Hot Cocoa! I love this because the ingredients are, Cocoa, sugar, vanilla. It's makes just like any other mix. A mug of milk 2 Tbl of mix. I added a big spoonful of homemade whip cream and sprinkled a little extra mix on top to make it fancy. 
Enjoy!

Friday, October 8, 2010

Squash Pasta

This is my family's all time favorite fall dish! I like it because it's easy and fast to make.

1 Butternut Squash
Olive Oil
S & P
Cheese Tortellini (or whatever kind of pasta you have on hand)
Chicken Stock, or Broth
cinnamon, nutmeg, allspice (or whatever your favorite fall spices are)

Preheat oven to 375
Cube Squash in big chunks. coat in olive oil, S&P, and put in oven 20-30 mins.
cook and drain pasta.
When Squash is golden brown and soft, remove from oven and put into blender with spices. Add Chicken Stock, blend until desired consistency. Pour over Pasta and enjoy.

I like to add cubed chicken to it as well, although I did not do that tonight. . . .because, well, Life happened.

Tuesday, July 27, 2010

Smokey Bacon and Cheesy Mac

I LOVE this stuff!! I made it for our little Bear's 2nd Bday and fell in love! I was so proud of my self because this is an original Recipe, and I.ROCKED.IT.
Keep in mind. I made this for 11 people. Adjust amounts according to what will fit your family.

1 22oz Bag of Large Elbow Macaroni
6 Strips of Bacon
3 Tbl Butter
1-2 C. Milk
1/2 lb Colby Jack Cheese -Grated
8 oz Smoked Mozzarella Cheese -Grated

Cook and Strain Macaroni. I had to cook mine in 2 batches because I don't have a pot big enough to accommodate such a HUGE amount of noodles. While it sits in the strainer I also like to put a Tbl of butter in with the noodles so that they don't stick together (you could also drizzle them with Olive Oil and get the same effect)
Cook Bacon in a Large pot.

When the bacon is all crispy and  yummy looking, Add Butter and flour.

After a minute or 2 slowly add milk while stirring

When you've added enough milk (I never measure this step so I honestly have no clue how much milk I used) to make a sauce consistency Add the cheese
I added all the cheese except for about 1 c Colby Jack and 1/2 c. Smoked Mozzarella

Add noodles, Stir. Pour into Baking dish and sprinkle with remaining Cheese

Bake at 350 for 15 mins, or until cheese is all melty and gooey!

The best part about this dish is that it can be made the day before. When you hit the baking stage, Instead of putting it in the over, cover it with tin-foil and stick it in the refrigerator. When you're ready to cook, Bake in a 350 oven for 30 mins with foil on, remove foil and bake an additional 15-20 mins!

Friday, May 28, 2010

ChunkyChickenNoodleSoup

A staple for any cook (good or bad) is a recipe for Chunky Chicken Noodle Soup!! It's simple, inexpensive, super tasty and insanely comforting! This is the fastest CCNS I have ever made! Not to mention the easiest. And on a rainy, drizzly day like to day, while my kiddos are down with cold, it's just what the Mommy ordered!
2  Stalks of Celery (preferably with the leafy tops) chopped
2 Carrots Chopped
1/4 yellow onion chopped
-Saute in 2-3 Tbls of Butter until soft
Pour in 6 Cups (1 3lb box or can) of Chicken stock (I use low sodium)
Sprinkle in 1 tsp Marjoram, thyme, and poultry seasoning
Bring to a boil then add:
4 Chicken tenders that have been cooked and chopped
1 1/2 cups (1/2 lb) of Wide egg noodles (or whatever kind of noodles you like or have)
Boil till noodles are tender and the sprinkle with 1 Tbl fresh Parsley!

Serve hot with Rolls and you have an instant Family Favorite!!

Tuesday, May 25, 2010

5-Minute Chocolate Cake

A friend shared this on Facebook and I just had to try it! Chocolate cake in 5 mins?! C'mon!!
This is the Link to the website (which is an awesome DIY Website for anything and everything)
My boys love this! Mainly  because they can help make it, or they can do it with some adult supervision (and help counting). And who doesn't love to eat stuff out of a mug?!
 It's pretty good for a cake that's made in the microwave!  A nice little indulgence!

I have found a couple things out from making this.
1-It doesn't stay all puffy and above the rim (I think that might have to do with the fact that my mugs are too big.
2-It falls fast. I took this pic maybe 10 secs after taking it out of the microwave.
3-2-3 toddler size hand fulls are the perfect amount of chocolate chips!
4-It's good. What more do you need?!